Operator
2004-2024 : Twenty Years of FM Synthesis inside Ableton Live
In 2004 I created Ableton's first software synthesiser - Operator. On the occasion of its twentieth birthday, this page provides background, a few tips and a download link to a pack with presets I and a few Ableton colleagues created for this occasion.
John Chowning and FM Synthesis
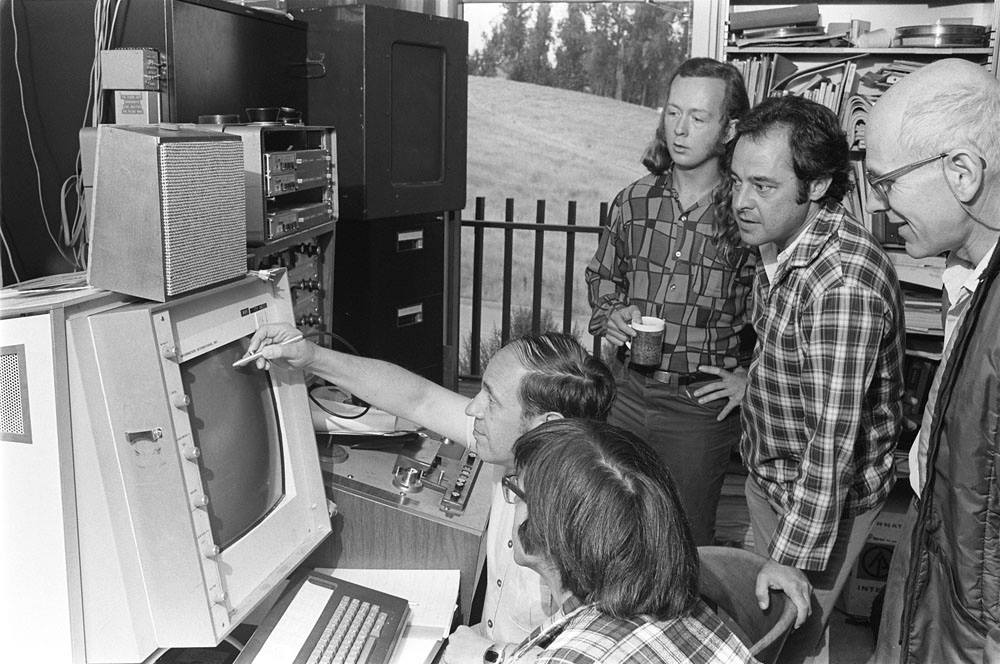
photo: In 1975 Pierre Boulez brought an IRCAM team to CCRMA for a two-week course in computer music. Seated by the computer (left to right) Pierre Boulez and Steve Martin (graduate student); standing (left to right) James (Andy) Moorer, John Chowning, Max Mathews. Photo by José Mercato.
On a hill next to the campus of Stanford University, a large radio telescope is gazing at the sky. Located even further away from the main campus, behind the telescope, was the first home of the Stanford Artificial Intelligence Lab (SAIL). Given its slightly exotic and remote status, SAIL could also host a new department that was concerned with using computers for generating musical sound: In 1964, with the help of Max Mathews of Bell Telephone Laboratories and David Poole of Stanford University, composer and percussionist John Chowning set up a computer music program using SAILS mainframe computer system.
Having access to a computer was a big deal at that time. Computers did not fit on a desktop and did cost as much as a big house.
Chowning became interested in the topic after reading an article by Max Mathews and subsequently he took a course in computer programming and went to Bell Labs in New Jersey to meet with him. When coming back to Stanford, where he studied, he was looking for a place to continue working on his ideas, and SAIL offered an opportunity. This later led to the foundation of Stanford's Center for Computer Research in Music and Acoustics (CCRMA).
Chowning was exploring sound spatialisation and worked on computer-generated quadrophonic music. His research led to the first generalised surround sound localisation algorithm. He soon figured out that more complex, alive sounds with vibrato are easier to localise and was looking for ways to create them with the computer.
"One evening in the autumn of 1967, Chowning was using the mainframe computer in the Stanford AI laboratory to model the sound of two sine wave oscillators in a simple modulation configuration, one altering the pitch of the other to produce vibrato.
Curious as to what would occur if he increased the rate and/or depth beyond what was possible with the human touch on an acoustic instrument, he issued instructions to the computer to try some basic multiples, doubling and tripling some of the numbers. And that’s when a curious thing happened: At the point when the rate of the vibrato increased to where it could no longer be perceived as a cyclical change, the sound changed from simple pitch fluctuation into a timbral change — a change in tonality.
What’s more, as the rate and depth increased further, he heard more and more timbral complexity. This was indeed the birth of digital FM." [1]
It became obvious that this method had a lot of musical potential. Chowning and Stanford University filed a patent [3] and reached out to synthesiser manufacturers to turn it into a commercial product. They ended up licensing the technology to Yamaha, and it resulted in a series of musical instruments that changed the world of synthesis forever with the 1983 release of the DX7, which sounded like no other instrument before and was a technological masterpiece. [2]
John Chowning's Music is as impressive as his contributions to computerised sound. His works 'Turenas', 'Stria' and 'Phoné' are seminal classics. Find more info about him here: CCRMA website
And here is one particularly interesting in-depth text by him about the realisation of Turenas: Turenas
How does FM work?

screenshot from the original patent. The object with the ~ inside represents one FM osciallator, its lower input is for its level, the upper input is defining its frequency. [3]
Typical 'analog' synthesis, as it has been established by Moog and others in the 1960s is based on one or multiple oscillators providing waves with a rich spectrum, such as a sawtooth or a square, and to apply (time-variant) filtering and a volume envelope to shape it into a musical tone by removing parts of the spectrum. This is called subtractive synthesis.
In contrast, FM synthesis in its pure form is using two or more sine wave oscillators and the complex resulting spectrum is a result of modulation one oscillators frequency (or phase, which is similar, but mathematically less complex to do) with one or more other oscillators.
The spectrum is a function of the intensity or depth of the modulation and the ratio between the oscillator that is at the output (the 'carrier') and the one which is modulating it (the 'modulator').
If the ratio between modulator and carrier is a whole number, harmonic spectra appear, and if the ratio is fractional, complex inharmonic sounds are the result. By changing the amplitude of the modulator with an envelope, the spectral richness of the sound can be a function of time, just like in real instruments. When using more than two oscillators that modulate each other, an enormous variety of rich timbres can be achieved.
The necessary complex control over pitch and phase of oscillators requires digital processing. FM Synthesis needs computers or dedicated digital hardware to achieve this.
Yamaha's DX7 synthesiser had six oscillators, each with its own multi breakpoint envelope. Smaller versions like the DX27 simplified this down to four oscillators, which still gives plenty of room for sound design.
FM synthesis does not need a filter, and no dedicated volume envelope. Every oscillator has its own envelope, and some contribute to the output and others to the timbre.
The Birth of Operator
screenshot: Invitation for the other Abletons to a preview of the prototype, September 7th, 2004.
Ableton Live started as audio-only application with no MIDI and no built-in synthesis with version 1.0 in early 2001. Computers, especially laptops, were not fast enough yet for multiple voice real-time synthesis. However, only a few years later things looked better, and we decided to add MIDI to Live Version 4. Whilst we were supporting Steinberg's VST and VSTI standard from the beginning, we also wanted to provide our own synthesiser.
It was my job to take care of it, and FM was an obvious choice.
John Chowning's music is dear to me, I was blown away when I first heard his compositions. And my first encounter with a DX7 as a teenager in a music shop felt like a quasi-religious moment, I could not believe the sounds coming out of that machine.
A few years later, all Monolake records own a lot to their sound to a selection of Yamaha FM synths, including the DX27, a SY77, and for a while even two more TG77 modules. More is more.
When the Max software (named after Max Mathews!) got its Max Signal Processing (MSP) extension in 1997, exploring FM synthesis was an obvious thing to do, and I wrote specific instruments for a lot of the early Monolake tracks in it.
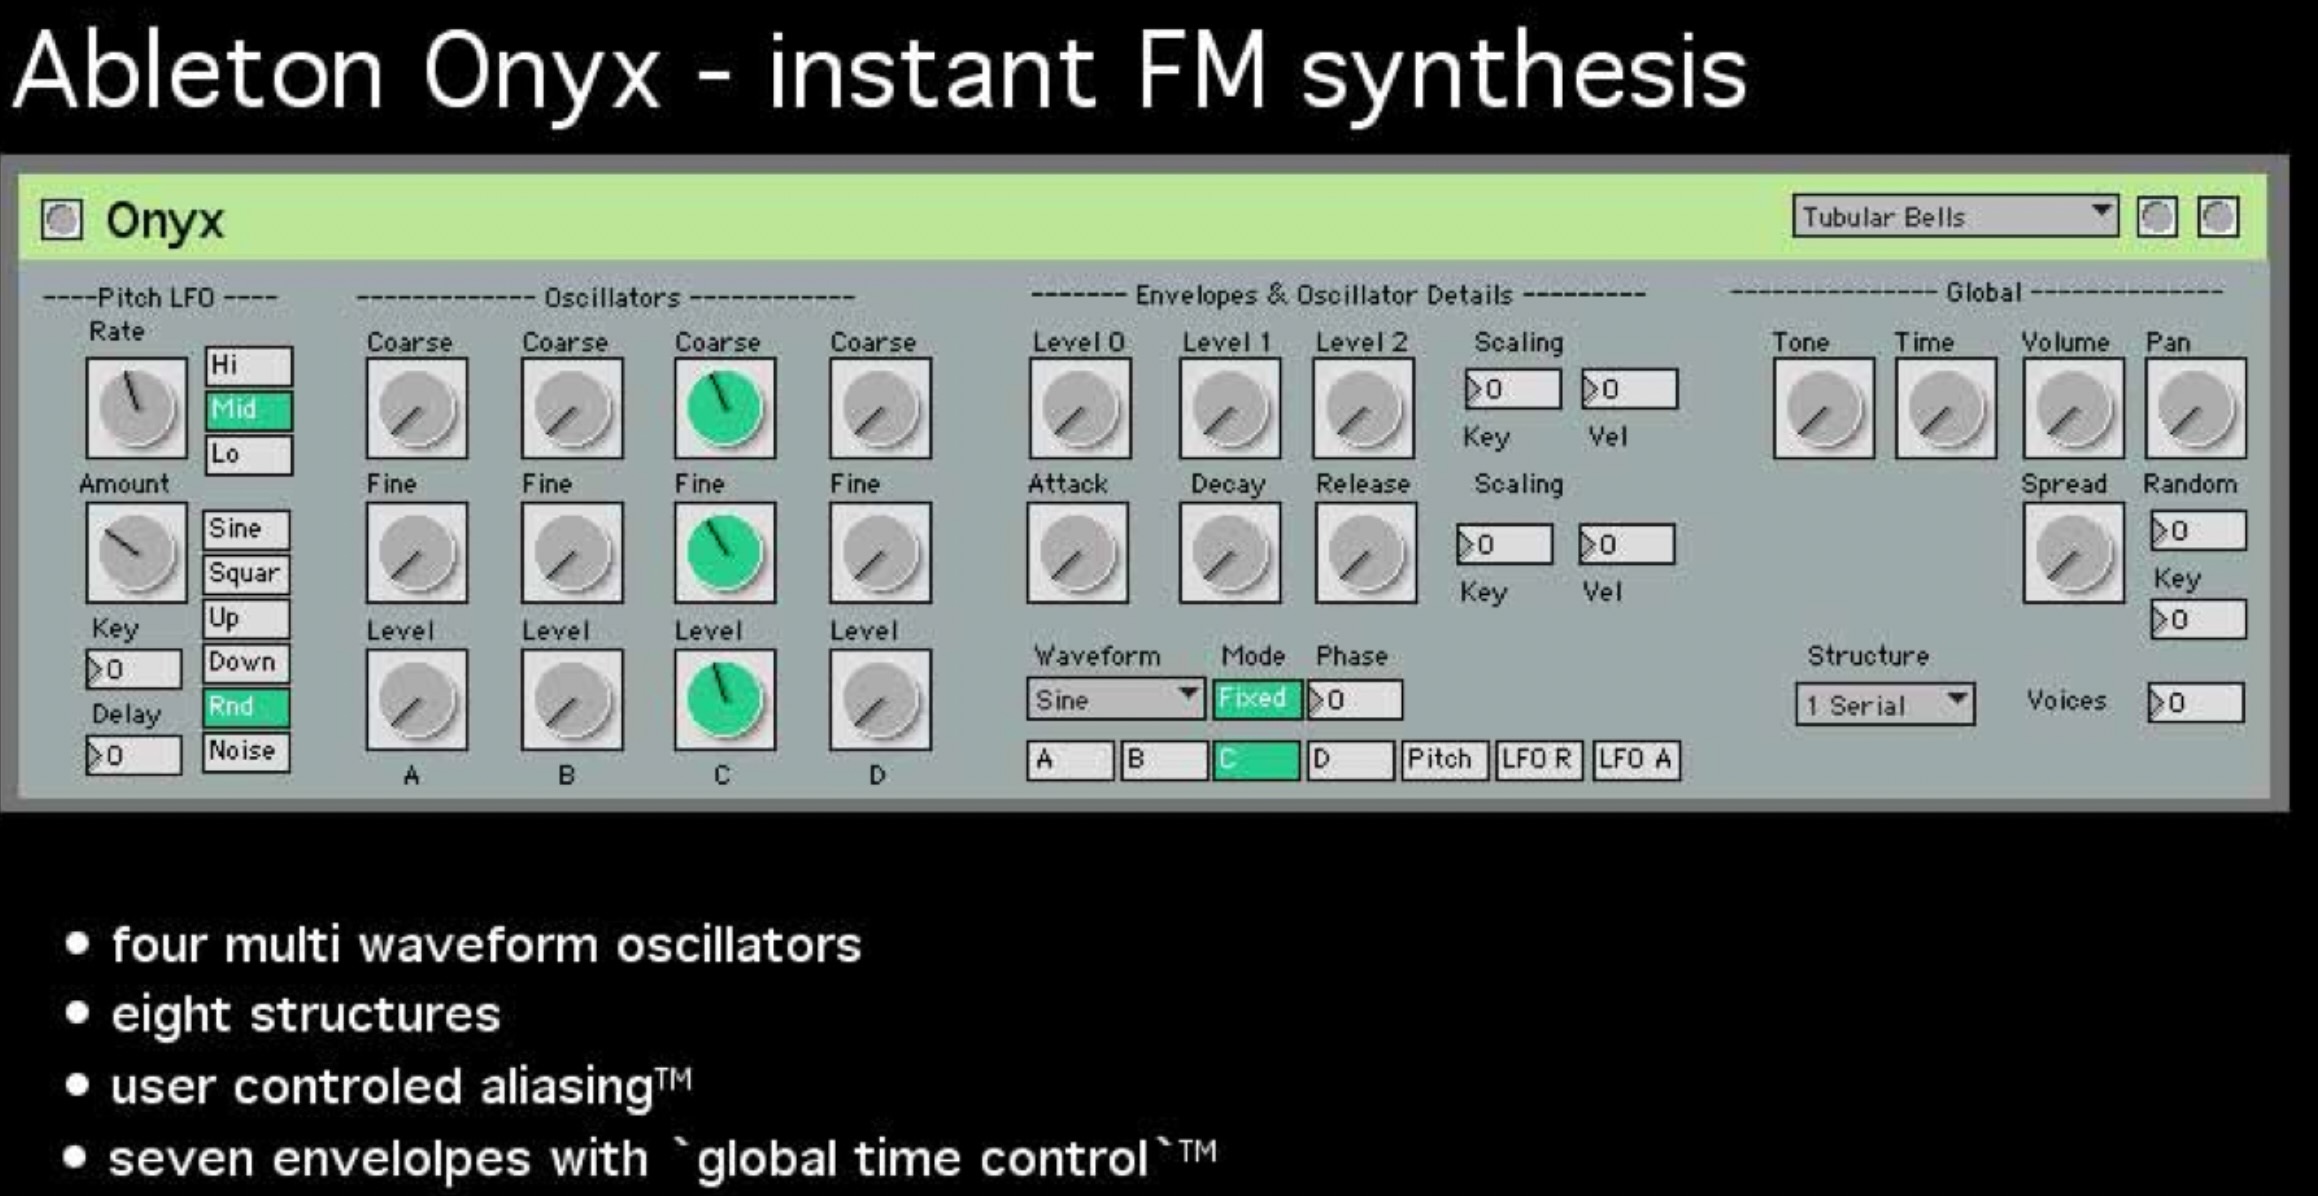
In 2004 I started to prototype Ableton's first synth and called it 'Onyx'. The goal was simple: It should not be heavy on CPU (which ruled out good sounding analog modelling), it should offer a huge sonic palette, and it should be fun to program. I took a lot of inspiration from my DX27 as a starting point.
Design Challenges
Screen estate was a big topic at a time when computer screens had 1024 x 800 pixels. It was clear that we cannot display all parameters at once. To solve this problem we invented a new paradigm in Live's visual language: A context sensitive 'LCD type' display sitting in the middle, which only shows the parameters of one oscillator or other essential building block at a time, and the main parameters arranged around it, so the basic function can be understood at one glance.
This concept turned out to work very well, and a similar method is used now for Granulator III. The 'LCD' became a standard UI element in Live, used in a lot of places. Whilst I was the principal developer of Operator, its native implementation in C++, the interface design, and a few quite essential feature decisions where the result of teamwork. Operator's visual language owns a lot to the original designer of Ableton Live, Torsten Slama.
I personally did not want to add any filters to it, because I wanted a 'pure' FM machine. But ultimately I agreed on having them, and they turned out to be very useful. Operator got it's final name from the way Yamaha was calling their oscillators: operators. In retrospective that name was a stroke of genius.
Love for Detail
Operator does not look like much, but a lot of thought went into adding details that make a difference. Here are some of them:
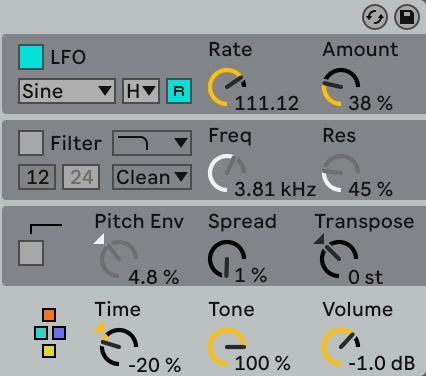
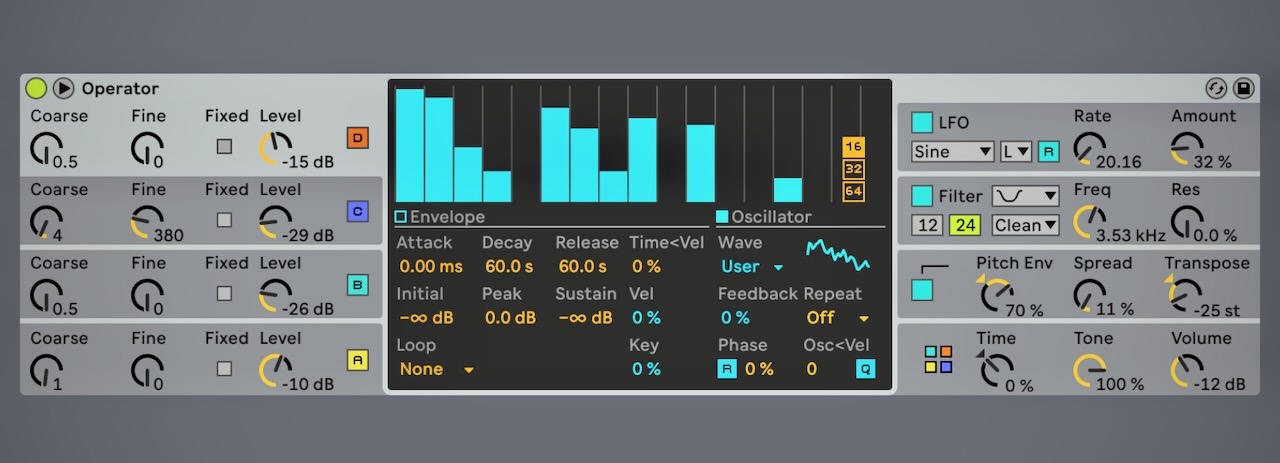
Global Time
This parameter allows to scale the time of all seven envelopes which is very handy for quick overall adjustment of all rates.
It can be a modulation destination for velocity, key, the LFO and the Aux/Pitch envelope and this makes it quite powerful. I am very happy I came up with that. Every synth needs this.
Tone
This is a special one, which in the original design was not even 'public facing'. When modulating a carrier with a modulator which either already contains a complex spectrum or has a high coarse frequency setting, the result can sound pretty harsh, due to aliasing.
To tame this, at the modulation input of each oscillator is a basic low pass filter. The original idea was to find one good sounding value and set it internally, but then I thought perhaps it is a good idea to have it as a control. Sometimes it is useful to have.
Spread
The New England Digital Synclavier II, another early digital synthesiser, with its own crude version of FM allows to stack two (or more) voices and detune them [4]. I always liked that chorusing sound, and Operator - as well as Sampler and the Granulator instrument series - borrowed this idea, but with a twist: Spread uses two voices, panned hard left and right in the stereo field.
Hence the effect of Spread is a bit stereo chorus like, but there is more: All random functions like free-running oscillator or LFO phases, LFO random waves, etc. are different for the left and right channel, creating a huge stereo image. Don't overuse it. Not every sound in the mix needs to be stereo!
Looped Noise
The oscillators in Operator are internally 'lookup tables', which contain one cycle of the waveform the oscillator produces. Not sure anymore about their size, I believe they are 1024 samples long.
The Operator 'NoiseLoop' waveform is just a bunch of random numbers. Whilst they are technically a short sample of noise, they repeat, which is exactly what noise does not.
However this method allows to tune the noise and create typical lo-fi game sound noise effects with it. The bad noise as a feature. And if you want real noise, simply add some slight FM modulation to it, and it will loose its repetitive character. Or use the other noise source, which is standard pink noise, generated in real-time. That one has no pitch control, of course.
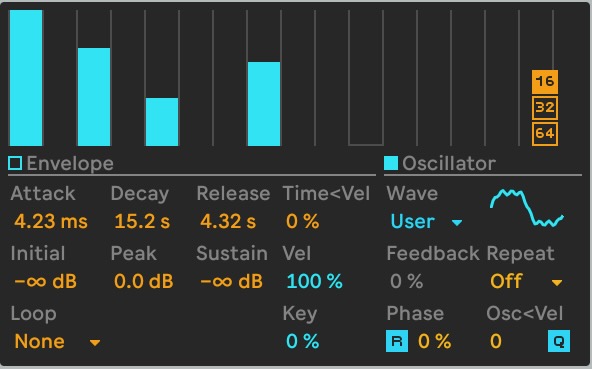
Additive Synthesis
In 2009 we added a way to create user waveforms via additive synthesis. Users can draw partials for each oscillator, extending the sonic palette a lot in an pretty intuitive way.
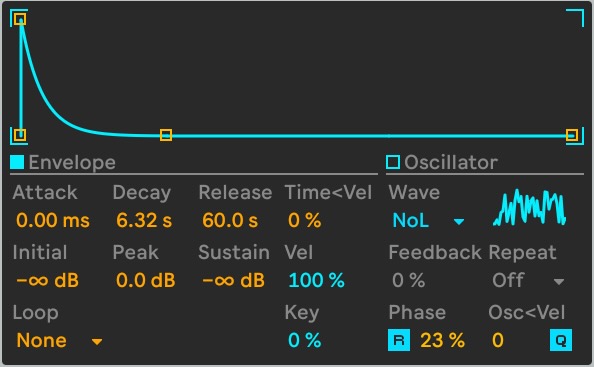
Zero Hertz
The Oscillators can not only either follow MIDI notes or have a fixed frequency, but they can also go down below audio range or completely stop. In that mode, they become effectively a wave shaper for the signal from the modulation input.
As is the case in the implementation used by Yamaha, the modulation input technically acts as a pointer to the beginning of the wave. If the Oscillator phase is shifted, or if the phase is not reset on start, or if the Oscillator is running at a very low frequency, the resulting wave shaping changes over time or for each note.
Side note: This is technically not really frequency modulation but phase modulation which provides very similar sonic results whilst being significantly easier to calculate which means less CPU usage.

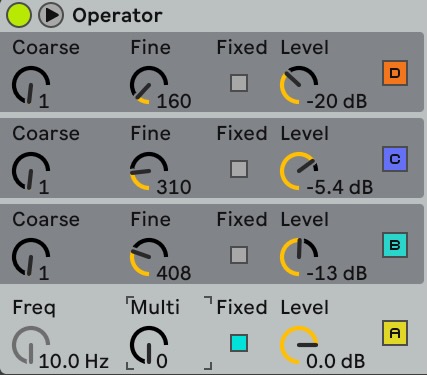
Copy Oscillators
Each Oscillator has a context (right click) menu that allows to copy settings from/to the other oscillators. It is located above the colored enable switch of each oscillator ('A', 'B','C','D')
Modulations
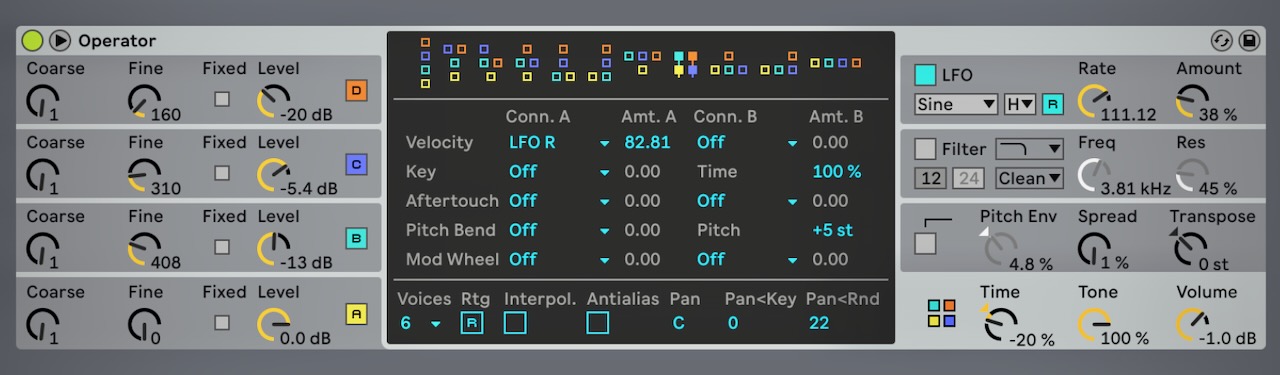
Although Operator does not feature a modulation matrix, there are plenty of modulation sources and targets.
The LFO, Filter and Pitch envelope can modulate a lot of things, and so can MIDI modulation, pitch-bend and aftertouch. Since 2024 Operator also responds to MPE pitch info.
A special modulation target is hidden in the oscillator sections: Velocity can modulate the pitch of each oscillator, and this can either happen quantised to coarse tunings or non quantised, allowing to either have (slight) pitch fluctuations depending on Velocity or jumping in harmonics.
Envelope Modes
Apart from the normal playback mode, the envelopes offer three more behaviours: Trigger plays through the complete envelope when a new note starts, independently of the note length. This is often very desirable for percussive sounds. Loop plays back the envelope segments repeatedly as long as there is a note held, and the Beat and Sync modes re-trigger the envelop at specified beat time intervals. Some of the sounds in my twenty years of Operator pack make excessive use of these modes.
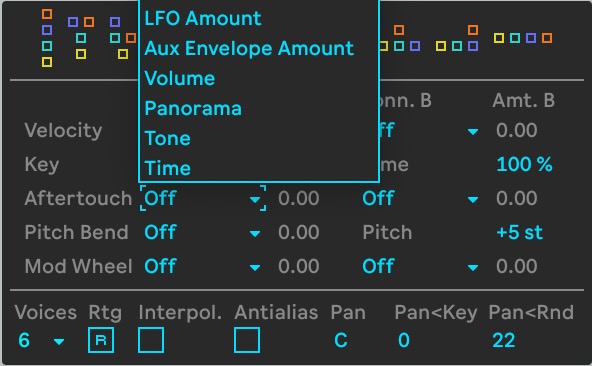
Interpolation, Aliasing and Sample Rate
FM synthesis can easily create harmonics that are higher than half the sample rate it is running at. This leads to a 'folding back' of the harmonics and the creation of new frequencies that have a very different relationship to the fundament frequency than what you would get from an ideal system with infinitely high sample rate. A way to tame that problem is the 'Tone' control mentioned above.
Since the 2009 oscillator re-design, two global settings where added to reduce artefacts:
A better interpolation which helps reducing noise when the oscillators play back complex waves at very low frequencies, and a better anti-aliasing, reducing the fold back at high frequencies.
However, technically better is not always sounding better.Some sounds do benefit from leaving one or both options unchecked. It is also cheaper on CPU. Also important: Sounds which rely on aliasing for their specific timbre such as high pitched metallic sounds, cymbals etc. might sound different when Operator is running at 44,1kHz or 96kHz. In doubt freeze the track or create samples from the sounds if you need to change the sample rate at a later stage in the production process.
Celebration Preset Pack

On the occasion of this birthdays, Christian Kleine and myself created and curated a free pack with selected presets, made in the last twenty years. You can find it here:
Operator credits: C++ code by Matthias Mayrock. UI by Torsten Slama. And a lot of contributions and feedback from all the other early Abletons.
Screenshots on this page made with my own Theme. You can grab it from here: roberthenke-live12-theme.zip
Footnotes and Links
[1] Quotes taken from a article about John Chowning on hub.yamaha.com.
[2] For a fantastic in-depth reverse engineering of the DX7 synthesis chip visit Ken Shirriff's blog about 'computer history, restoring vintage computers, IC reverse engineering, and whatever'): www.righto.com
[3] The Stanford FM patent turned out to be extremly lucrative for the university, since FM synthesis was the core of one of the most common PC sound card in the 1990s. Here is the patent: US4018121.pdf
[4] The FM synthesis of the Synclavier II was technically much less advanced then what Yamaha offered, it used a two osciallator structure where the carrier was an 8bit additive wave and the modulator an 8bit sine wave.
This sounds very crude but also makes it unique. My dedication to the Synclavier deserves its own page some day...
Another interesting long interview with John Chowning: www.rnz.co.nz